|
Build Blog This page last updated 12-1-2023 **** May take some time to load due to many pictures- Please wait***** |
Page 13
This is the start of taking the car to another level.
Jan 2023- Roll Cage Install.
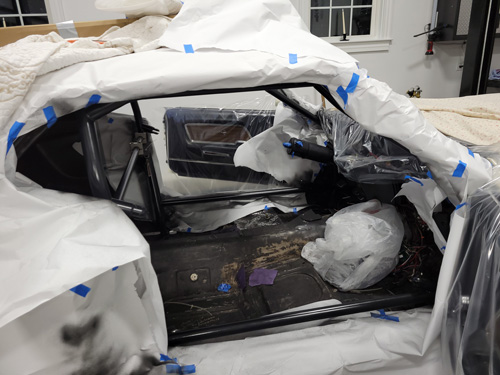
With the last engine rebuild the car has consistently been in the 9's, so time for more safety upgrades. Went from the 6 point roll bar to a 10 point roll cage. The original roll bar was made with 1.75" chrome molly, so I left the main hoop, and rear bars, however, all of the added bars (lateral supports, dash bar, A-pillar bars, rocker bars, roof hoop, as well as new door bars with swingouts) were done in 1.625" Chrome molly. Given how tight the cockpit is, the A-pillar bars really needed to go through the dash, making this a bit more challenging to do. The complete dash needed to be removed and a bunch of modifications to get everything back in. After tearing that all apart, I was able to relocate some of the inside dash items to add a dash bar. This was not required, but would help with safety and chassis stiffening. After I gutted the car I had BFR Chassis install the new bars since some custom bends were needed.
Besides the install of all piping being time consuming, the dash pad modifications seemed like it took for ever. Given the shape of the dash pad, and how the two A-pillar bars came down, it was too difficult to make a template to cut the pad, so it became an iterative process where I held the pad to the area, marked and cut. Did this over an over to make sure that the pad was as tight as possible around the pipes, especially from the inside of the cockpit. I wanted to try and keep the inside face of the pad intact as much as possible. In the end the dash pad had two cuts on either end that were like V's with a rounded point. The dash now slide in and out easily, just like it was before.
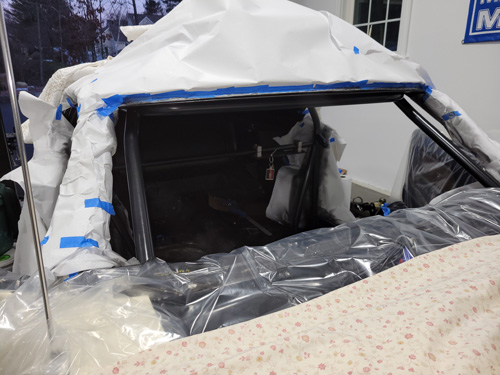
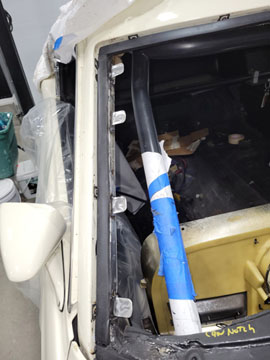
To cover the two cuts between the windshield and bars, I used some pieces of 1/8" thick black textured ABS plastic to make covers. The textured finish is similar to the original dash pad texture, and once both were painted with SEM Landau black, they matched well. With the windshield removed I had good access to this area.
With the dash pad installed a cardboard template was made, then the ABS was rough cut. A heat gun to warm the plastic, and small roller was used to shape the plastic to follow the dash.
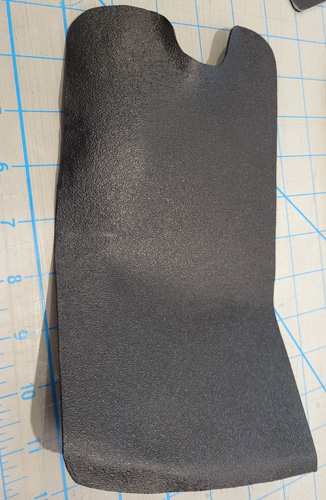
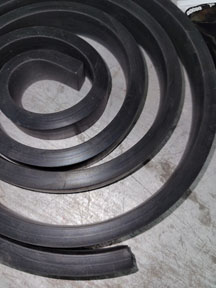
Started with the flat sheet shown here, did a rough form with the heat gun, trimmed it to eliminate excess, and then did the final form.

This is the passenger side cover after being formed. After both sides was done,a fresh coat of SEM Landau black paint was done to the covers and entire dash pad. Final installation of the covers used automotive trim double sided tape to secure it to the dash.
Here is the cover installed in the car. To improve the fit I will need to put the car in the hot sun this summer to heat the plastic and work on shaping it a bit better.
Now with the seat in place, I am so glad that the extra effort was made to have the bars go through the dash. It is still very tight!
I have been trying to get the chassis inspected and certified for the past 2 months, but wanted to keep moving forward since a number of interior items had to be modified. I realize that I will have to remove a few things to aid in the inspection. Hopefully everything is okay, and once certified, I will get the carbon fiber tube protectors in place.
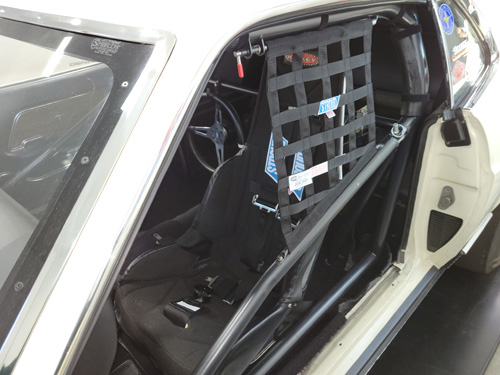
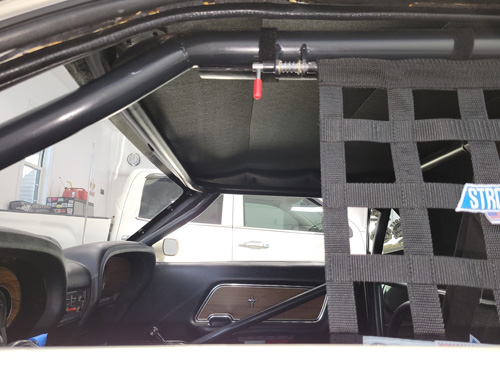
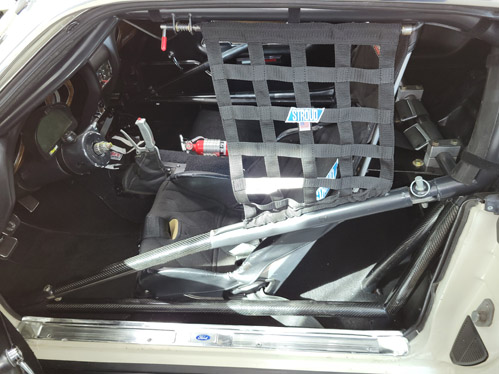
Installed a Tim McAmis Quick Release Kit for the window net, along with a custom Stroud Net. Besides a nice clean install this kit makes it very easy to latch and remove the net.
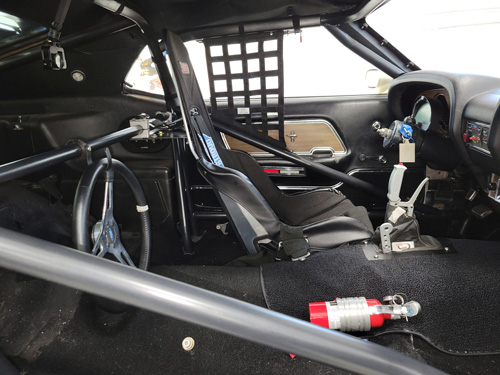
Pics with the carbon fiber tube protectors

Added added a tinted sun shield next to the mirror.
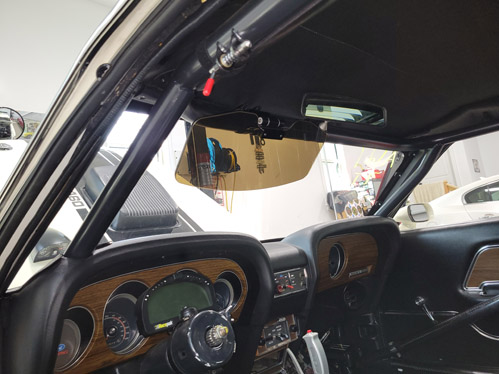
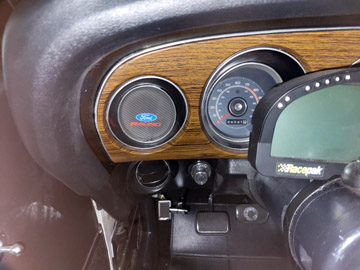
The one thing that I had to remove was the Ammeter from the gauge cluster. There just was not enough room between that corner of the cluster (back of gauge) and the A-pillar bar. To fill in that blank space I created a carbon fiber looking plate to fill the open area. The Racepak data logger and the IQ dash mounted on the column display voltage and log it, so nothing lost.
Feb 2023 Transmission and Transmission Tunnel Modifications.
This past winter was time to have GForce refresh the G101a transmission. Now with the car 95% a track car I had a few modifications done during the refreshing. First was to make it easier to shift under full throttle with no clutch, so the 1/2 slider was changed to a zero degree slider, and the 3/4 slider was changed to a 3 degree slider. The standard were 7 degree sliders. I found that under acceleration, especially from 1st to 2nd gear to 3rd, I had to blip the accelerator to smoothly shift with no clutch. Some of this is in part due to the weight of the car and the load on the drivetrain. The second change was switching from the H-pattern shifter to the Long Vertical-gate shifter.
Switching to the Vgate ended up being very time consuming to get it to fit requiring what I consider significant transmission tunnel modifications. On top of just getting the transmission to fit in place, additional clearancing was needed to just get it into place with the Vgate shifter installed. To properly set the shifter stops, the input shaft needs to be rotated and there should be VERY SLIGHT drag on the input shaft when the transmission in held tightly into gear. Whenever the shifter is removed the stops should be reset (per Gforce), so the transmission really should be installed with the shifter assembly in place.
I had considered going with a 5-Speed transmission, but given how tight everything is now (maybe 1/2" between the seat and tunnel), I do not know how I could of made it fit.
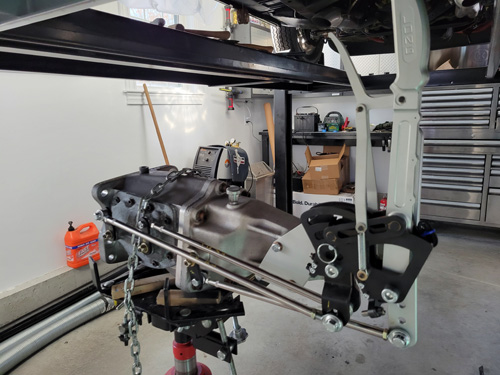
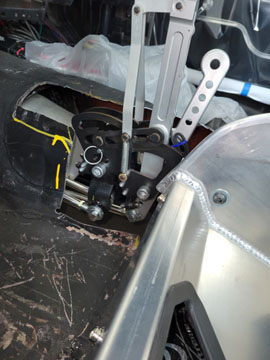
In order to position the shifter to fit me best given the straight up shifter handle, a 6" rear offset bracket was used. The issue with this is it now makes the transmission assembly about 4" longer, and thus a larger tunnel top opening was needed.
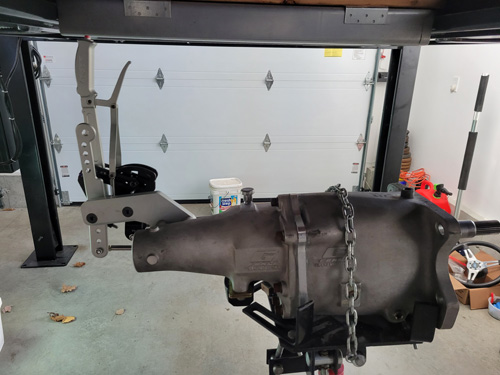
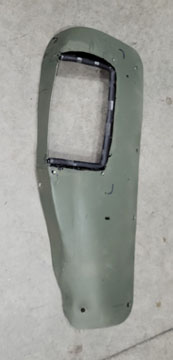
Below was the starting point and the cutting continued where the top of the tunnel had to be opened back about 18" to make room for the shifter during install. The initial mockup was done with only the scattershield installed and no clutch. Then after I was able to get the transmission in place to see what I had to work with. The second phase was with the clutch installed since that would limit my wiggle room now that the input shaft had to slide it more straight. The side of the tunnel was also cut open about 14" and the area in front of and behind the shifter made more vertical. The Vgate sticks out to the side much more than the H-pattern. The extra open area in front of the shifter was where the H-pattern/OEM shifter was, but those handles curved back to where the V-gate is now. A dome shaped piece of metal was welded in that front area to give a smooth transition to the top removable cover below.
Both GForce and Long Shifters have always been great to work with. Great products, excellent guidance and fast turn around time.
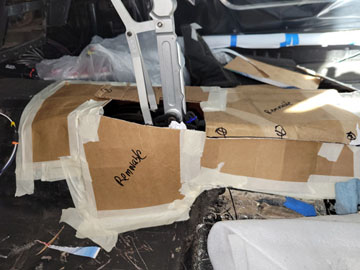
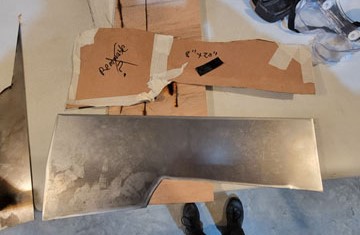
The new tunnel started with a cardboard mockup of the metal pieces to get approximate sizes and then started shaping the pieces and welding in place. As you can see from the cardboard, the tunnel side was opened up significantly to aid in fit and installation.
Top of the tunnel has a removable cover that was shaped to blend into the old and new tunnel. To give some perspective on how far over the Vgate shifter handle is from the H-pattern shifter, the reverse handle on the right is about 1.5" left of where the H-pattern handle was.
The top cover shifter opening edge wrapped with rubber split channel to protect some of the sensor wires (such as transmission input shaft to measure clutch slip, as well as O2's that go to the Racepak) that will pass through the hole. Nuts were welded on the underside the cover for the shifter boot trim ring bolts.
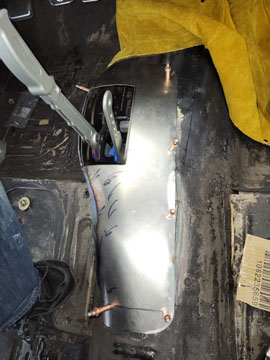
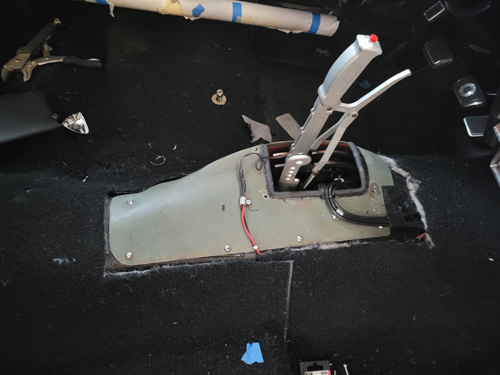
Final top cover installed. Removal of this cover is very easy allowing the transmission to slide right in place. Nuts were welded on the underside the tunnel for the mounting bolts.
The stock carpeting could not be stretched to fit the oversize tunnel, so it needed to be cut. I was able to purchase a yard of carpeting that was close to the stock carpeting to make a matching carpet cover to drape over the tunnel to finish it off. The shifter boot is in place with Velcro and once installed a trim ring is the finishing touch. Given the multiple curves of the tunnel, the flat piece of carpeting had to be sliced and sewn in 2 areas so it would sit smooth, then the edges were bound. There are also a few strips of the Velcro hook pieces on the underside to hold it in place to the existing carpeting.
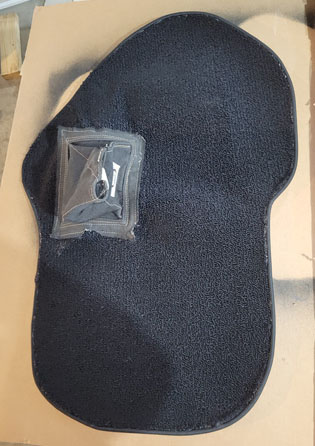
Minimal modifications were needed to a Performance Analysis Shifter boot to work with the shifter. This boot was made for NASCAR and was one of the more flexible and larger boots that I could find, plus it has a flame-retardant carbon outer fabric with an aluminized inner material. The boot was finished off with a basic boot trim ring I fabricated out of aluminum and shaped to the area.
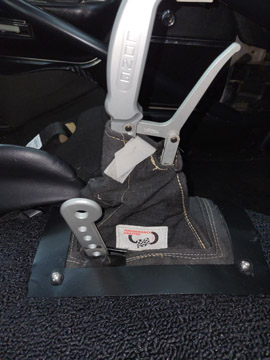
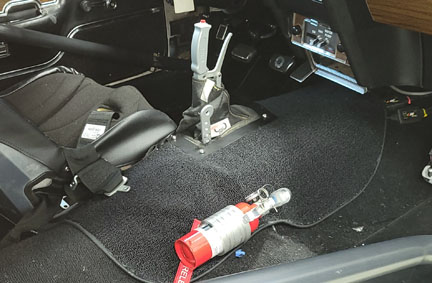
Completed install of the setup. As you can see from where the shifter is now located, without that 6" rear offset bracket, the shifter would be very close to the dash, and a stretch for me to comfortably reach.
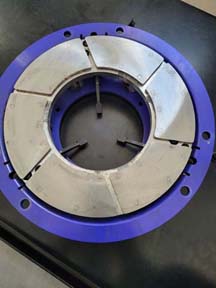
Lastly on the transmission front, Cale at Black Magic Clutches refreshed the Next Gen Clutch/FW assembly that he previously built for me. I am very happy with all of the work that and especially the guidance that Cale has provided for me over the years. Between Cale and previously Tim Hyatt (RIP), are the best!
Feb 2023- Polycarbonate Windshield.
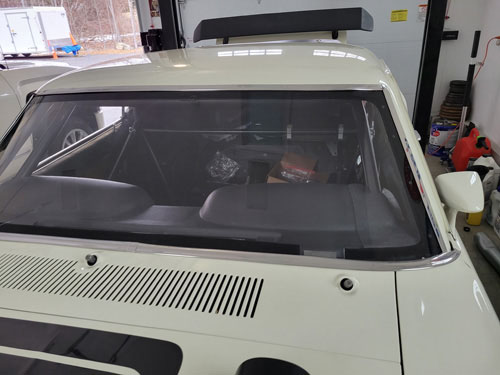
Since the windshield needed to be removed for the roll cage install, I decided to swap the heavier and somewhat worn DOT glass for a "Racing Sheilds" Polycarbonate 1/4" windshield with their Supercoat protective coating. There were many options out there for glass, however, part of the reason I went with a Shields were good reviews from others and they had a drop in place version that did not require any trimming. Their customer service folks were very responsive and in the end I received the windshield three weeks earlier than they quoted.
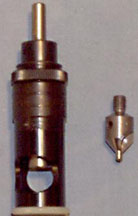
This windshield is under half the weight of the 32 lbs. DOT glass coming in at 15 lbs. and extremely clear with no optical distortion.. After the mockup in the window channel and identifying where the screws needed to be, the windshield was drilled (very slowly) every 4" with a special plastic/Polycarbonate drill bit with the backside supported by a piece of wood to minimize any chipping. The holes were then countersunk with the countersink tool below. This tool can be accurately adjusted for depth making sure sure all holes are all the same and the screw heads perfectly flush with the surface.
The inside 2" edge of the windshield was masked off using 3M Super 88 Vinyl Electrical Tape which gives a nice fine edge and will hold up to any accidental hits when sanding versus other tapes. The edge was sanded with an 1" wide 80 grit flap sanding wheel on a drill (per the recommendation of Shields) to remove the hard coating, then hand sanded with 220 grit, then 320 grit- I probably could of done another sand with something finer, but it still looks good. Cleaned with isopropyl alcohol and painted with the Jerry Bickel Window Border Spray Paint. This paint required 4 light coats for full coverage and laid down very well. The VIN area of the windshield was masked off so the dash VIN could still be viewed.
Given the curve of the glass on the ends and how close the screw holes would need to be drilled near the windshield edge, I was concerned that any flexing would cause it to crack. I opted to weld 4 tabs on each side of the A-pillars so the screw holes would be about 1.5" into the windshield. The tabs were painted black, the interior moldings were installed with minimal modification and with the border paint, they are not easily visible. All that is visible are the 4 screw heads on the outside and those were painted black to blend in. The rest of the screws are under the stainless trim and not visible. The windshield is held in place with 8-32" Stainless Steel Hex Drive Flat Head Machine Screws with nylocks. This allowed tightening them "just enough" to minimize any future cracking.
In order to reinstall the original stainless trim and to get the correct windshield to body height I used the Jerry Bickel 3/8" Rubber Window Installation rubber. This rubber is very dense and provides a secure mounting surface. Pieces of this rubber were also put on the 4 tabs to maintain the height. Given that these old cars were not perfect, the standard OEM install counted on the windshield sealer to take care of any irregularities in the evenness of the channel, especially where the top roofline and lower cowl areas met the A-pillars. To make those transitions smooth I used a small die grinder with a Roloc sanding disc to remove enough rubber so when the windshield was in place it laid down "mostly" flat. This set the level just right with the body. Once the mockup was done, the windshield was secured in place and the screw holes were drilled into the body using the windshield holes as a guide to ensure perfect alignment.
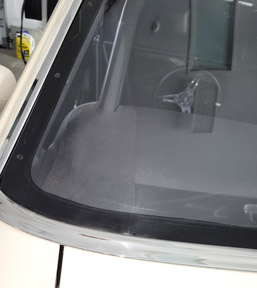
Here is the finished install with the factory stainless trim in place. Everything fits nicely. Prior to trim install it was a perfect time to buff the original stainless and get it shiny new.
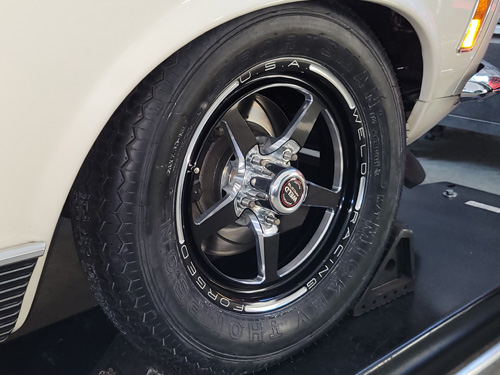
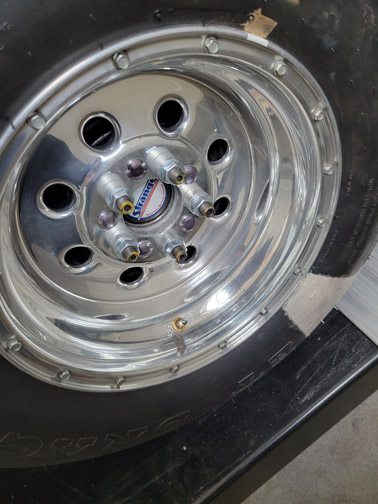
March 2023 New Front Runners and Wheels.
Decided to pick up some new front runner tires (Mickey Thompson Sportsman 26 in. x 7.5-15), and part of the "diet program" picked up some Weld AlumaStar-2 15 in. x 3.5 in wheels. The end result of the 2 wheel/tire combos was a reduction of 17.2 lbs. At some point I may swap out the rear Weld Draglites.
The plan is to scale the car in the next week to see where things stand now. Hoping that between the various changes made they will offset the added weight of the cage upgrade. My rough estimate indicates a 5 lbs. overall increase worse case. There are still a number other things that are on the future diet wish list for next winter, such as lighter weight front brakes, fiberglass font bumper, and who knows what :).
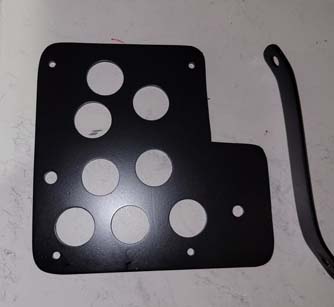
March 2023 New Racepak Sportsman Bracket.
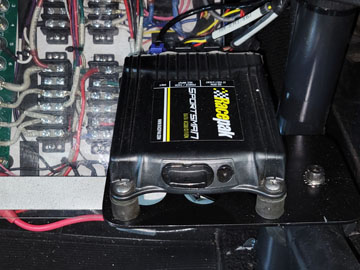
With the cage install, a few other miscellaneous things needed to be moved and the the Racepak Sportsman logger was one. Fabbed a bracket assembly out of aluminum plate and secured to the rocker bar with two split collars making it very solid (needed for the G-Meter/accelerometer) and easy to access.
Underside of the bracket and base mounted.
March 2023 Scaling Car after weight reduction to offset 8.5 cage.
The upgrade from the roll bar to the 8.5 cage added about 54 lbs. This was raw pipe weight not counting for pipe cuts. In an attempt to offset that, I was able to reduce some other items such as the windshield (17 lbs.), Front wheels (17 lbs.), and removal of heater box assembly (15 lbs.), for what I had estimated as a net gain of about 5 lbs. not including removal of the Dynomat on the floor (weight TBD). Looking at the numbers below there was an actual reduction in weight of 11lbs race ready.
The scaling just the car: minimal fuel (<1 gal), no driver weight
LF 902 RF 893 Total Front 1795 lbs 57%
LR 669 RR 692 Total Front 1361 lbs 43%
Total weight 3156 lbs a reduction of 13lbs
Race Ready:
LF 967 RF 926 Total Front 1893 lbs 56%
LR 774RR 712 Total Front 1486 lbs 44%
Total weight 3379 lbs a reduction of 11lbs
There are other diet items on my wish list such as lighter brakes, and a fiberglass bumper and possibly hood. Part of the never ending list of things to do and spending of $$$$$ :)
April 2023 First time out for the season.
This weekend finally got to the track for some TnT and overall it was a pretty decent day. I was able to do some adjustments, but more are needed. These passes were to get familiar with all of the winter changes and iron out any issues.
Challenges:
1. I had a difficult time getting the car to hook, but with tweaking the rear
shock rebound settings, and tire pressure it improved. Still more is needed.
2. I adjusted the clutch base at the track, but it does need a little bit more counter weight and perhaps 1/2 turn of base looking at the data logs. On one pass, I adjusted the rear shock rebound 2 clicks looser so it would plant the tires harder and reduce the spinning, and yes they planted better, but at the same time the clutch slipped too much and I aborted the pass. Knowing that I was on the edge I returned the rebound to the previous settings and focused on the clutch. Need to find the balance.
3. The clutch is only used for launching, and in the past I had to quickly blip the accelerator dropping the rpms about 200-300rpms in order to pull it out of gear. Now with the VGate shifter, and with the 1-2 slider being 0*, and 3-4 being 3* from the previous 7*, I can shift it with the accelerator planted to the floor and just yank that Vgate! It feels great shifting. Now the challenge is breaking that muscle memory and stopping the automatic blipping of the accelerator-need to break that habit :)
Progress;
60's started out at 1.551 and ended up at 1.415, but still breaking loose, even
spinning a little on the 1/2 shift. Looking at the data log, the best 60 of
1.415s had about 0.67s of spinning, with .4 being excessive, as compared to
last year having 1.37 60's. So definitely room for improvement.
Good Notes:
Even with the not so great 60's, the 1/4mile ET were 9.7x so in line with last
year, however, the mphs all increased.
330' = 4.066s
1/8 = 6.26s @ 111.51mph- previous best was 110.72
1000' = 8.17s
1/4 = 140.49 mph- previous was 139.13
If I can get it to hook better, and as long as I do not fk up, should be closer to 9.5x with this 140mph. I can even see a little need to adjust the carb jetting, but not till I work out the launches.
Scaling: In my thread above I had mentioned rescaling the car, the scale at the track was within 1lb, so things aligned.
Next steps:
1. Still need to look at the data logs to get a better estimate of how much
more counterweight to add, and possibly a little more base.
2. And just get back out to pick up where I left off and keep tuning.
May 2023 Chassis certification
I did get the 8.5 cage certified back in April with no issues at all. The inspector commented on the quality of the work and was glad to see the extra bars (rocker bars and dash bar, as well as the outriggers between the subframe connectors and the rockers). Cleaned up a few things now that that was done, and installed some carbon fiber Tube protectors.
June 11, 2023 Back to the track
Made it to the track to do some more testing and was able to get in 6 passes.
On a good note, solved the voltage drop issue, as well as improved the fuel pressure fluctuation. I still have an upgraded fuel system on my to do list.
Track conditions were very different that day versus earlier in the season with the day being, hot and humid. I was spinning off the line as well as on the the 1-2 shifts bad. The 1st 2 passes were AWFUL on the launch with the worst 60's I have had in years. The video below is pass 2 with a 9.82 sec pass at just over 140. The 60' was not good being at 1.56! It was spinning so much that the front did not come up much, so minimal weight transfer.
Pass 3, loosened up the front extension and the pass was a "little" better.
For the past 3 years my best tire pressures have always been in the 13.5 absolute min to 15psi range. Given the day was flying by, for pass 4, I decided to make 2 bigger than normal changes at once. Lower the tire pressure to 12 from 13.5, and loosen up the rear extension 3 clicks so it would bite harder. 60' was 1.43, with a 9.74 at 139.7. Still spun so, so with about 40 minutes left, lowered the pressure 11.5psi and things got slightly better. 1.41 60, at 9.71 at 139.9. Last pass was at 11psi and and hooked hard pulling the engine down.
Camera battery died after pass 2, so no video on the remaining passes. Ended up the day on a somewhat ok note.
Some of my previous baseline chassis settings that always worked may be off now with installing the full cage since the chassis is definitely stiffer.
Makes me wonder how good the car would go if I can get the launch better.
As you can see, it spun spun and spun :)
Pass 2 Video
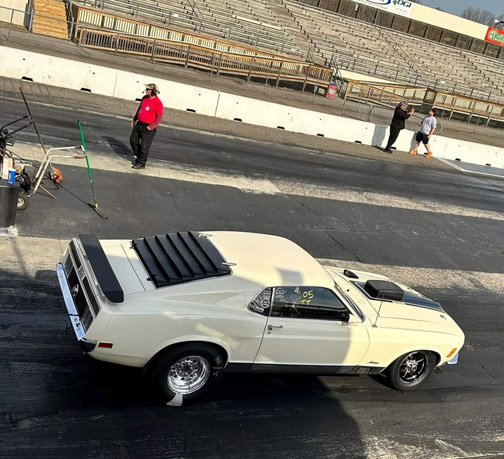
June 22, 2023 Car Walk around
Did a short walkaround video of the car. It captures more things than the still pics I previously posted. Yes a bit on the dirty side underneath from seeing the track :)
Walk Around Video
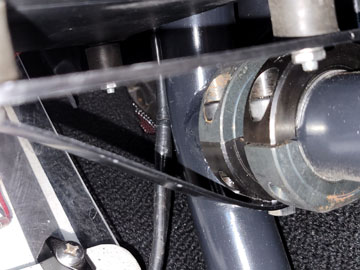
July 10, 2023 Upgraded Strange axles with 5/8" studs
Trying to be safer and avoid breaking/twisting wheel studs, upgraded the HyTuf axles to 5/8" studs. The Weld Draglites fit with with just some very minor passes with a sand paper roll to remove any burs.
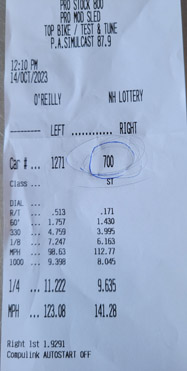
End of the 2023 Season:
Ended the 2023 season on a good note with new best times and mph or 9.635 seconds and 141.28. The car was also veey consistent.
End of season passes
Click here to go to the next page