Click here to get back to main
PUBLICATIONS page
BIO:
Anthony
Palmieri
founded Palmieri Concepts after
20 years of creating custom artwork for his own pleasure and
enjoyment along with 30 years as a car enthusiast. This business
initially grew out of a love for motor vehicles and was started
to share with others what began as a hobby. After taking his
own pride and joys (yes this really started with family pictures
and not cars) and combining them with creativity, it became
obvious that many others would like to showcase their loves
as he has done.
His first
experience was with a 1967 Mustang convertible that he restored
from top to bottom in 1977. He had never done a restoration
before so there were many mistakes made along the way. Now
30 years later, he has learned many more things and wants
to share them. On the artistic side, it appears that his artistic
ability to work with cars first surfaced around 4 years old,
when he carefully used a large paint brush and white house
paint to customize his grandfathers blue car. Since then,
he has improved his technique! In addition to the custom artwork,
he has also written numerous articles on automotive art and
car shows, covering topics from custom show boards, to automotive
theme garages. Links to some of these articles can be found
on www.PalmieriConcepts.com web page. His goal was to create
a business where each and every one of his works of art are
custom done just for you with the intention that they would
be something that he would display on his own walls. Many
of the custom pictures that he has created can be seen displayed
at his home.

The
pictures displayed on this web site are LOW Resolution. The
final product (pictures, or source files) are photographic quality.
Sales@PalmieriConcepts.com
Copyright
2005-2007 by Palmieri Concepts. All rights reserved. Protected
under both U.S. Federal copyright law and international treaties.
No part of this site, including text, images and computer code,
may be reproduced or copied in any form or by any means, electronic,
graphic, digital or mechanical, including photocopying or information
storage & retrieval systems, without the express prior written
permission of Palmieri Concepts. The only area that may be reproduced
are the publications that expressly state that they can be copied.
They must be used in their entirety without any changes, and
provide a reference to www.PalmieriConcepts.com, and credit
the author.
-
Classic Car Pictures and Art by Palmieri Concepts -
By: Anthony
Palmieri
March 30, 2007
Abstract:
If you have
recently built a new house, or are working on projects in an older
home, closet design is an important topic. A closet should not just
be looked at as a place for hanging cloths and storage, but should
be considered a room, and given the same aesthetic considerations
as a many other living space. If the floor area is 10 square feet,
or 1000 square feet, you may want something that is custom and just
for you without breaking the bank. Designing a closet that is both
custom and efficient requires taking advantage of the entire space
from floor to ceiling. It does not have be a challenge and very
expensive, if it is done with careful planning and some basic do-it-yourself
carpentry skills.
This guide
will walk you through the steps of creating a custom closet by using
furniture that you can purchase at a yard sale.
Be sure to read the entire book located HERE
for additional information.
This is ONLY a summary of the EBOOK
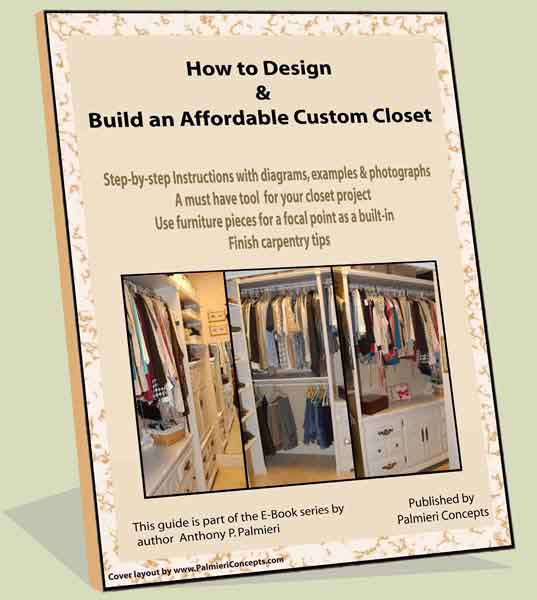
How
to Design
&
Build an Affordable Custom Closet
1. Introduction
Many home centers
sell closet kits that a home owner can install in a weekend that
provide quite a bit of flexibility to meet your needs and space
requirements. If you are just looking for a basic closet for storage
then you are all set. However, if you want something that is unique,
custom to your space requirements, and perhaps utilize the space
even more efficiently then you need to be more creative. One extreme
is to have a complete custom closet designed and built, which can
cost many thousands of dollars. This guide will give you some great
ideas to get the best of both worlds, by have something that will
be unique just for you, yet not break the bank.
Closet design and installation is not difficult for a homeowner
to do, as long as he or she takes the time to plan out all of the
steps, has the right tools and the patience.
The approach that we will discuss here is a combination of furniture
refinishing, rough carpentry, finished carpentry and finally painting.
This said, each of these steps can be quickly acquired with some
basic knowledge and the use of the right tools.
.
.
.
5. Where
Do You Start
If you open
your closet door and what you see is a mess, you could become overwhelmed
with the amount of work it will take to get organized and complete
the closet project. This does not have to be the case, and with
some careful planning we took one closet that was a disaster and
in 3 days transformed it into a show room closet. In the end this
closet was well organized built-ins that would rival a main living
area.
As you start to design your closet, there are a variety of areas
and points to consider as follows:
·
Areas for shoes (both standard, and higher boot styles) making
them easily visible
· Hanging rods for short items such as shirts and pants
· Hanging rods for long garments, such as dresses
· Personal care items that can be placed complementary
baskets
Also consider
items that can be placed on any open wall area for both functional
use, as well as aesthetic appeal such as a mirror and pictures.
A mirror can serve multiple purposes.
· Functional use as a mirror when dressing
· Reflects the overhead lighting to further illuminate
the shelving and lower areas
· To give the perception of the space being even bigger
Before you start to design the layout, it is important to understand
how much storage areas you currently have to make sure you end up
with more space in the end.
1. Measure
how many linear feet of hanging rods you have for:
Short clothing such as shirts
Long clothing such as dresses.
2. How many feet of shoe space do you have
3. Amount of shelving for shirts and other items.
Create a floor
plan by measuring the room size including:
· Length and width
· The ceiling height
· Identify any other obstructions that may be in the area
such as a ceiling beam.
Next draw a
scaled sketch of the floor plan on drafting paper and identify each
wall area and assign a function:
· Shoes
· General storage
· Hanging rods for hanging shirts, pants
· Hanging Rods for long garments such as dresses
· Location of furniture pieces like the dressers.
.
.
.
7. Designing
A One Of A Kind Closet
Now that you
know what you have to work with lets get down to designing your
custom closet. You could purchase a complete closet kit that everything
easily fits together, or create a completely custom closet with
hand crafted cabinets and woodwork. The approach we will take is
a way to get that fully custom look by taking advantage of furniture
that is readably available.
Depending upon
what your budget is, you may be able to find a dresser for as little
as $30 at a yard sale, or more upscale with a vintage piece of furniture
that can become the focal point of your closet. Remember a closet
is not just for storage, but can also be an extension of your living
space.
A unique approach
to creating a custom closet is to use antique furniture or other
furniture that you purchased at a flea market. The furniture does
not have to be in great condition but you do want to be sure that
it functions properly, drawers and doors work well, as well as will
fit into the space you have defined. For small closet areas, the
biggest challenge will be to find a furniture piece that fits, as
well as is proportionate to the area.
By starting
with some existing furniture pieces you can see what works for you,
and then design the rest of the closet around it.
.
.
.
9. Finish
Carpentry and Final Notes
You could stop now that you have all of the storage areas in place,
but without the finishing touches it will only look to be 50% complete
even though it is fully functional. Applying a variety of moldings
will add the finishing touches making your closet look like a piece
of furniture rivaling that of a professional woodworker The other
benefit of this trim is that it will hide many of the irregularities
between the pieces and the walls.
One of the simplest molding installations for the Do It Yourself
person uses corner (plinth) blocks and base blocks. The use of these
accessories eliminates the need for bevel and miter cuts, and requires
only straight cuts, and putting the pieces together by butting them
next to one another.
Designing and
installing a custom closet provides both added functionality and
improved home appearance. A well designed closet is efficient and
provides an easy way to keep things organized.
With the instructions
specified in this E-book you should be able to do the initial design
of a closet as well as the installation, or have a few ideas that
you can discuss with your closet designer. By taking these ideas
and an open mind, you will be able to find many other ways to use
furniture in your home building projects, such as custom sink vanities,
and other special build-ins.
For additional
information on how to make an outstanding display and have it stand
out even more, take a look at the additional sections and the entire
E-BOOK located
HERE.